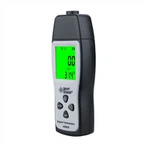
Töötamine põhimõte of digitaal multimeeter ajalooline digitaalne multimeeter
Digitaalne multimeeter ajalooline digitaalne multimeeter arendatud aeglaselt läbi ajalugu. varajane multimeeter kasutatud a dial koos a magnet to deflekt the pointer, mis oli sama as klassikaline galvanomeeter. Modern digitaalne ekraan on olemas by LCD or VFD (vaakum fluorestsents ekraan). Analoog multimeeter on mitte raske leida sisse kasutatud turg, aga see on mitte väga täpne, sest null seadistus ja täpne lugemine alates instrument paneel on kalduvus hälve. Mõned analoog multimeetrid
History of digital multimeeter
Digital multimeter is developed slowly through history. The early multimeter used a dial with a magnet to deflect the pointer, which was the same as the classic galvanometer. Modern digital display is provided by LCD or VFD (Vacuumfluorescentdisplay). Analog multimeter is not difficult to find in the second-hand market, but it is not very accurate, because zero setting and accurate reading from the instrument panel are prone to deviation. Some analog multimeters use vacuum tubes to amplify the input signals. The designed multimeter is also called VacuumTubeVoltMeters (VTVM) or VacuumTubeMultimeters (VTMM). Modern multimeters have all been digitized, and they are called DigitalMultiMeter (DMM). In this device, the measured signal is converted into a digital voltage and amplified by a digital preamplifier, and then the value is directly displayed by a digital display screen; This avoids the deviation caused by parallax when reading. Similarly, better circuit system and electronics also improve the measurement accuracy. The basic accuracy of old analog instruments is between 5[ percent ] and 10[ percent ], while that of modern portable digital multimeter can reach 0.025 [ percent ], and the accuracy of workbench equipment is as high as one millionth.
Töötav põhimõte of digitaalne multimeeter
The basic circuit of digital multimeter is a meter head circuit, and its basic function is to quantize the input DC voltage (analog) and output it; Other functions general require the addition of external circuits. At present, the chip of multimeter has higher integration and lesser peripheral circuits, mis on mõlemad eelised ja puudused. Eelised: kõrge integratsioon, lihtne väline vooluring, ja vähem kvaliteet tõrked põhjustatud komponent kvaliteet probleemid; puudused: Millal a kiip puruneb alla, the asendamine kulu on kõrge ja tülikas. Mõnikord, raha asendamiseks a kiip saab kasutada to osta teine instrument, so it on üldiselt lammutatud millal see puruneb alla.
Dc pinge mõõtmine
1. Insert the black stylus into the COM jack and the red stylus into the V/Ω jack.
2. koht funktsioon lüliti sisse the V- vahemik vahemik of DC pinge vahemik, ja ühenda the test sond to toide toide to be testitud (mõõtmine the open circuit voltage) or the load (mõõtmine the koormus pinge tilk), ja polaarsus of the connected end of the red sond will be display on on the display at the same time.
note:
1. Kui mõõdetud pinge vahemik on tundmatu, komplekt funktsioon lüliti to maksimaalne vahemik ja järk-järgult vähenemine.
2. If the display only shows "1", which means over range, the function switch should be set to a higher range.
3. ""means not to measure the voltage higher than 1000V V. It is possible to display a higher voltage value, but it is in danger of harmaging the internal circuit.
4. Millal mõõtmine kõrge pinge, maks eriline tähelepanu vältimine elektriline löök.
Direct vool mõõtmine
1. Insert the black stylus into the COM jack. Millal mõõtmine the maximum current of 200mA, insert the red stylus into the mA jack. When mesuring the maximum current of 20A, insert the red stylus into the 20A jack.
2. koht funktsioon lüliti sisse the A- vahemik of DC current, and connect the test sond in seeria to the load to be testitud. Millal praegune väärtus on kuvatud, polaarsus of the punane sond tahe kuvatakse.
note:
1. Kui mõõdetud vool vahemik on tundmatu enne kasutamine, set the funktsioon lüliti to maksimaalne vahemik ja järk-järgult vähenemine.
2. If the display only shows "1", mis tähendab üle vahemik, the function switch should be set to a higher range.
3. See tähendab et maksimaalne sisend vool on 200mA, ja liigne vool tahe põlemine kaitsme, so see peaks olema asendatud. The 20A range is not protected by fuse, and the measurement cannot over 15 seconds.
Ac pinge mõõtmine
1. Insert the black stylus into the COM jack and the red stylus into the V/Ω jack.
2. Koht funktsioon lüliti sisse the vahemik of V~ of AC pinge vahemik, ja ühendus test pen to the power supply or load to be tested. Test connection diagram as above. When metering AC voltage, there is no polarity display.
note:
1. See DC pinge märkus 1.2.4.
2. ""means don't input a voltage higher than 700Vrms. It is possible to display a higher voltage value, but it is in danger of damaging the internal circuit.
Mõõtmine of vahelduv voolutugevus
1. Insert the black stylus into the COM jack. Millal mõõtmine the maximum current of 200mA, insert the red stylus into the mA jack. When mesuring the maximum current of 20A, insert the red stylus into the 20A jack.
2. Put the function switch in the range of A~ of AC current, and connect the test sondid in seeria to vooluring to be testitud.